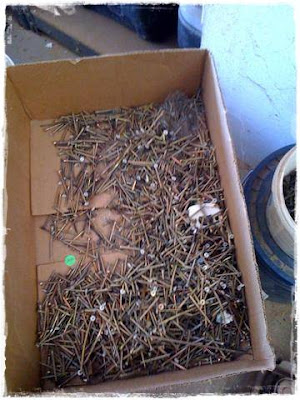
step 1: materials

 and all the right tools
step 2 (or 3 or 4 maybe): after cutting 2x4's in the appropriate size screw them together in squares (it is all actually very exact and if it wasn't just right we would take it apart and do it again!)

 step 17: take a rest
 step 35: screw in pieces for your seat (the master-mind, Jane, below helping fix someones mistake)
 step 77: put the back on the chair. finally started to look like a chair, with the help of a cute little boy who loves tools! (working is always a lot more fun if the kids are happy!)
 step 102: write love notes and positive affirmations on your seats that will never be seen. I believe in good karma and positive attitudes. I believe that my kids will feel the love that was put into these chairs when they read stories or play house, or whatever it is they will do. I LOVE MY MESSAGES.

step 145: (was also step 3, 15, 18, 37 and 88): find more screws! and a cute lady to collect them never hurts!
step 162: staple fabric
step 190: upholster foam under fabric
step 250: cardboard, staples fabric, foam - its coming together!


step 300-815: staple, unstaple, upholster, unupholster, attach, unattatch, reattach, stretch, cut, rip, stretch, match, hammer, screw, staple, glue, sweat, etc. etc. etc... and so I have a semi 99% kind of wonky finished product but I could not love it anymore. Lots of love and sweat, a little bit of tears and blood, hardly any money at all (only going to IKEA and letting the kids pick out their own fabric) and voila...
THE FINISHED PRODUCT!
THE FINISHED PRODUCT!


10 comments:
I am officially amazed and jealous! They are so cute. Well I guess I am not amazed - you guys are wonderful Fullers after all!
love,
Edith
Jenny, I LOVE THEM!!!! I absolutely LOVE THEM!!!!!!
JENNY!!! I am AMAZED and so IMPRESSED with your great chairs! What a project that looks like, but the outcome is perfect. Be proud! Be very proud! Love them!
So cute! I only wish that I had helped with them, and had lots of fun with you.
Totally cute! I love it!
WOW Jenny! That is truly amazing and you made it look so easy.
step 300-815-- haha your so funny.
I love the way yours turned out! I love the little talbe inbetween them too!! SO CUTE!
Those chairs are awesome Jenny!! Great job!!
You are amazing! I wish I had your talent! Make me some!?!?!
Cute chairs! You and your sisters are so creative! I love the hidden messages. I wich I would have done that when I recoverd a chair!
Post a Comment